|
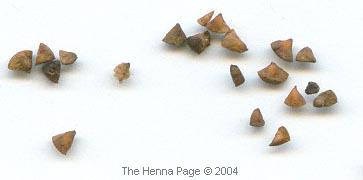
Henna seeds are small, brown, and triangular. I was amazed when I first got mine-- never having seen a henna seed before, I was surprised by their size. I have tried this technique several times at about a 95% success rate. With this in mind, don’t try to germinate too many at once as you may end up with too many seedlings! I recommend that you store your seeds in an airtight and light-proof container. I keep mine in a empty Marmite jar-- black glass with a threaded plastic lid. First things you're going to need are a clear plastic bag (one that you can seal firmly), and some paper towels. What we are going to do here is force germination by tricking the seeds into winter mode and then into spring time (and germination) mode. Place the paper towels on a flat surface. You’re going to need to use several sheets to make it nice and thick and also strong. Sprinkle some cold water onto the sheets to make it wet-- you don’t want to soak it, though, as it will fall apart when you try to pick it up. 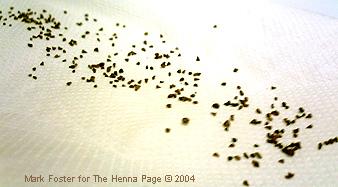 Now get a pinch of seeds and sprinkle them along the paper towels, creating a line of seeds down the middle. Now fold the sheets over, trapping the seeds in the middle. Now you’re going to need to place it in your plastic bag. Fold the paper towels over as many times as necessary to get them to fit in the bag. Now you should seal the bag as you need to keep the moisture inside it. The stronger the seal, the better. Tying a big knot in the top is quite effective, or even better if you can get a Ziploc bag. Now for the winter part. Place your seeds now encased in the bag in the refrigerator. Now they are nice and cold thinking it's winter time . . . lying dormant waiting for nice spring time weather to initiate germination. 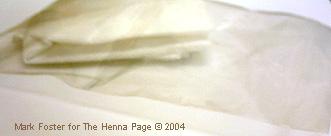 Now leave the seeds for four days before going to check on them. Removing from the bag carefully, unwrap the seeds and you should see white flecks on the seeds. They are germinating. Wrap them back up and place them back in the bag. Put them back in the warm spot for a few more days. 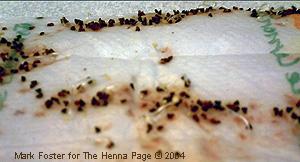 I leave my seeds to grow until around 1cm long, at which point they are easy to remove from the paper towels without any potential damage to now-growing plants. Now you can plant them. I place mine about 3cm apart in a shallow pot. At this point, I also mix some sand into the soil. This is good for drainage and I believe it is a more natural mixture. Place the soil into a pot. Leave about 2cm from the top. Now gently place your little shoots inside and then cover them, filling up the pot to the top. I prefer to do this in a small shallow pot at first, as I like to keep them warm by placing the pot near the heater. Within a couple of days you will start to see the shoots breaking through the top and starting to grow upward. Now you're on your own . . . the best I have achieved in the UK is a plant about 5cm tall. Mark
Foster ~ Henna-Boy Studios
 For more information on cultivating and using fresh henna, see: Return to the Index
of Henna: Lawsonia Inermis
*"Henna,
the
Joyous Body Art" Can't find what you're looking for? Try: The Henna Page Main Index http://www.hennapage.com/henna/mainindex.html the Encyclopedia of Henna Catherine Cartwright-Jones c 2000 registered with the US Library of Congress TXu 952-968 |