|
by Jewel, for Henna Page, c 2003 copyright registered with US Library of Congress, all rights reserved
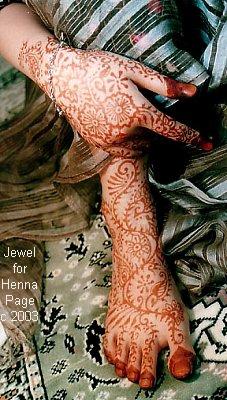
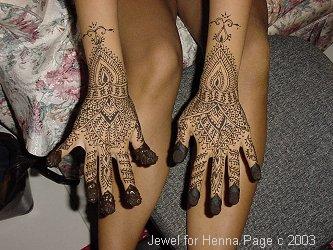
Bridal work can be so much fun! It is nice to know that you are a small part of such an important event in someone’s life. Bridal henna work is a little different from doing henna at fairs, parties and such. In the former, the artist’s concentration would only be on the bride. Be informed if there are other people who want to be hennaed on that day. If the hosts expect their guests to be hennaed, it is good to have another artist to assist you while you concentrate on the bride. Bridal henna patterns are essentially detailed, intricate and complex. A lot of experienced henna artists have little trouble executing very detailed and intricate patterns on themselves or others. In applying bridal henna, the artist has to be able to do this on traditionally six body parts in one sitting: the top of both hands, two palms and the top of both feet, plus finger and toe tips, if the bride asks for it. You can take anywhere from 1.5 to 6 hours to complete a full bridal job, depending on intricacy of design and experience of the artist. My first bridal work, on my best friend Rina, took 6 hours to complete. Now I work anywhere between 1.5 – 3 hours. The ability to speedsling is indeed a very treasured skill in doing bridal work.
Patterns and portfolio… Bring along a portfolio of your work or pattern books for the bride to choose patterns from. There should be a range of different styles: Indian, Moroccan, Arabic, modern, and maybe, even a tribal collection or two, for the less traditional bride. After a certain style is chosen, try to do a variation of the selected pattern. This way, you push the boundaries of your own creativity and expand your portfolio at the same time. Positions… Your sitting position, with respect to the bride’s is important, more so for some than others. Both of you will be sitting in the same place/position for some time and it would be a good idea to find a comfortable position to prevent your backs, necks and legs from aching. It would also do both parties good to stretch once in a while. Personally, I find that the best position is sitting face-to-face with the bride. It helps to have a good rapport with your client too! If you’re sitting on the floor, make sure both of you are sitting on semi-hard cushions and that your back is straight and not contorted or twisted. Use a short stool or hard cushion for her to place her hand. The stool/cushion should be high enough so that you don’t have to bend your neck too much. The idea is to make sure that your back is in a comfortable position at all times and you’re not bending down too much.
Getting started… A little planning on which
zones
to start first would help you tremendously and minimise smudging
accidents.
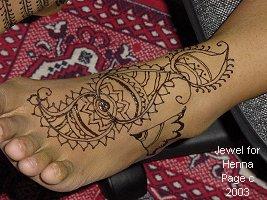
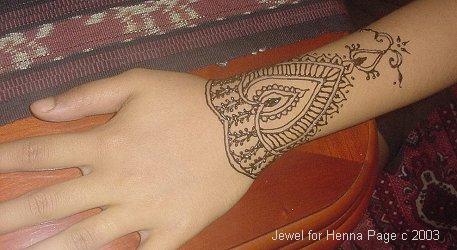
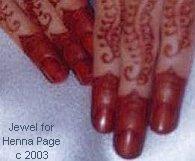
I always start drawing on the top of hands first. Then I do the feet
and
the palms last. The skin on the top of the hand is sometimes the
hardest
to stain so I like to leave the paste on longest there. By the time you
get to the palms, the tops will be dry. The bride can then rest her
hand
on the cushion as you work on her palms. If the design goes all the way
up the forearm, start drawing the pattern from the wrist, up the
forearm
and then work your way towards the fingers. This is to prevent smudging
of the finger/palm patterns as you progress.
|
|
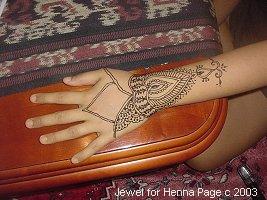
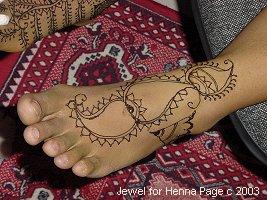
Design framework … When working on a complex and intricate pattern, it is good to first draw out the “framework” of the design before adding the intricate parts. This will help to better organise the placing of the pattern and would also aid with the visual balance. Draw out the paisleys, for Indian style or sections for Moroccan style on the hand/foot. You can also use water-soluble pencils to draw the framework.
Details, details, details … Once most of the major frameworks have been mapped out, start filling in the details using basic filigree fillers, for Indian style or geometric lines/patterns for Moroccan design.
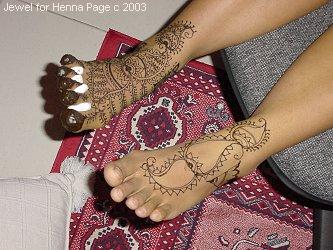
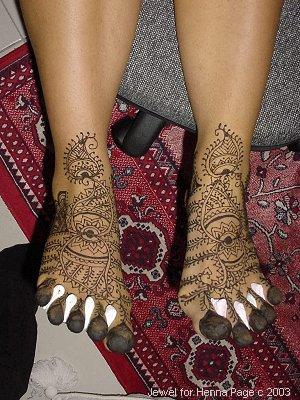
Finding symmetry … Very often, making the patterns on both hands/feet symmetrical can be a little tricky. This is where drawing out the framework of the pattern comes in handy. Align the hands or feet together and make markings on the area to be worked on. Draw out the framework of the design and fill in the details as in the step above. The two sides won’t be EXACTLY mirror images, but at least, they will look balanced.
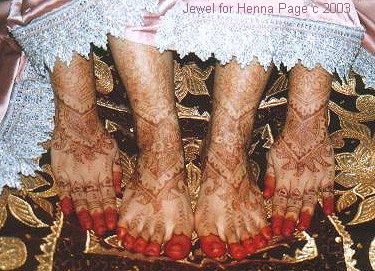
Drawing on the feet… I would have the bride sit on a comfortable chair and prop her legs up on another stool/hard cushion/adjustable chair. Her calves will rest on the stool so that her ankles and feet are hanging (see photo above). If she owns a recliner, use it! This position is useful for patterns that wrap around the sides of the feet and heels. With the feet elevated, you need not bend your head down too much. This position is also good for when you apply the toe tip henna caps. Blood red tips … I always use henna from Mecca for this purpose because Meccan henna stains the nails a beautiful ruby red! |
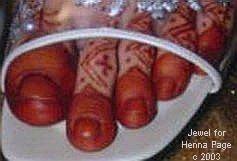
Beautiful ruby red nails with
Meccan henna!
|
Meccan henna is VERY coarse. I normally use it for my hair or for finger/toe tips. To apply, just spoon the paste into a plastic baggie/cone. Cut off one end/tip and apply as normal. (Photos coming soon) Documentation … Make it a point to bring your camera along with you for every gig. Document your work at the end of everything, just before you leave. If possible, make an appointment with the bride to get photos of the stain a few days after or get the bride to send some ‘after’ photos to you. You will find that this does not only help expand your portfolio, you are able to see how your work has improved!
By Jewel
(Siti
Marina Masduki)
A printable PDF version of "Bridal
Henna" by Jewel is available from Henna Page!
7 June 2003 Singapore All original
artwork by Jewel
unless otherwise stated.
You may print this article out for your own reference, and to use in your personal henna work. If you would like to use this for teaching purposes, or to share with your women's group, you may do so, but please contact us first! You may not publish or disseminate this in any format without written permission from Jewel and Henna Page! This is copyrighted material! All
text and
images on this page
copyright 2003 all rights reserved Catherine Cartwright-Jones The Henna Page 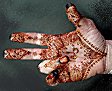
Back to "Complex Henna" index How do you find out
"how"?
Look in
Can't find what you want here? Try The Henna Page Main Index. |